We're still working on squeezing a nursery in across from the office desks in our second room, the soon-to-be combination office/baby room. It's a long process but I promise a full reveal soon! We've managed to get a lot of the nursery stuff second-hand and have kept things very inexpensive with crafts and do-it-yourself projects.
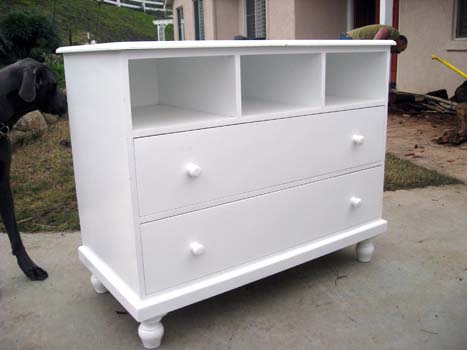
My sister-in-law gave me a changing table dresser that belonged to my niece and nephews. However, it was white and didn't match our dark cherry crib, so we decided to paint it a complimentary color (yes, I said paint…not stain. We did contemplate staining but it's a lot of work and the changing table looked like some parts were particle board, which can't be stained anyway).
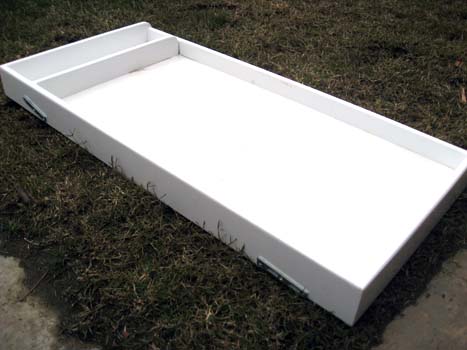
Another secret to keeping costs down: find multi-purpose furniture that can grow with the child. The changing portion of the table detaches so that the table can serve as a simple dresser when the kid gets older. Between this and our 3-in-1 crib, the baby's set until he or she is past toddlerhood.
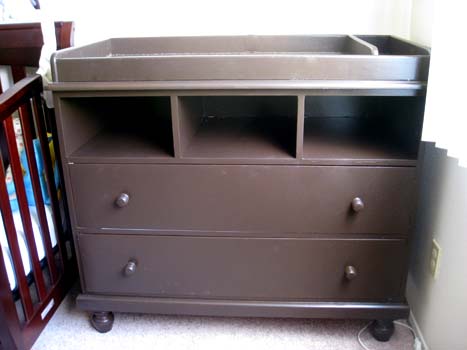
Obviously, I enlisted help had someone else do all the work for me since I'm pregnant and can't be breathing in paint fumes. For now, we went with a simple, semi-gloss coat so that I can easily wipe it down. In the future, I may distress it to give it that unique shabby chic look. Here's the finished product:
When repainting furniture that's already been painted, it's easiest to get a paint that's the same type as what's already on there (water-based or oil-based) and simply paint over it. Otherwise, you need to strip or sand it all the way down and use a primer before painting. To determine if the paint that's on the furniture already is water-based latex or oil-based paint, rub some rubbing alcohol on it. If the paint is water-based, the rubbing alcohol will take the paint off. Otherwise, you know it's oil-based. Buy the same type of paint and lightly sand the piece of furniture with 100 grit paper (to give the paint a better surface to stick to) and apply a thin coat of paint with a paint brush or small foam roller. Let dry and then apply a second coat. If you want a really finished, wipeable surface, top with two thin coats of finish (again, use oil-based finish to top oil-based paint or water-based finish to top water-based latex paint).
When painting baby furniture, give it at least a week to dry fully so that no fumes are released around the baby and take care to use a lead-free paint. If you're painting a crib (or other piece of furniture that the baby may chew on), use a high-quality, durable finish and an enamel that will dry hard so it won't chip off.


Nice!
I love re-purposing perfectly good things too! best wishes on the completion of your new space, and thanks for paying me a vist on my SITS day! 🙂
~h
Thanks for sharing you experience with all of us.. It will be a great help for those who want to paint there furniture.. I was looking for the nursery and reached here.. I enjoyed reading your post..
I am thinking about painting an almost all particle-board chest-of-drawers. It has never been painted before. I don’t know if I need to sand it or not! I am nervous!!! This was a great post, thanks!