I always smile a little when friends and readers ask what our most popular posts are. Surprisingly, the post that's received the most views ever to date was a guide we threw together on a whim all about composting. It provided a quick run-down on composting basics: get a composter, put stuff in there, stir and repeat. Readers often email us with specific questions, so we figured it's about time to put together a more thorough composting guide. Let's call this little composting guide “Composting 201.”
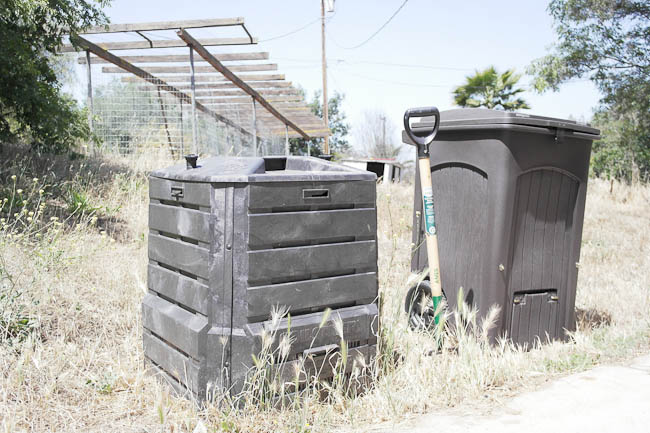
We explained in our last composting guide that we got our first composting bin through a county program, and we keep it at the back corner of the house by the chicken coop. I call her Bessie.
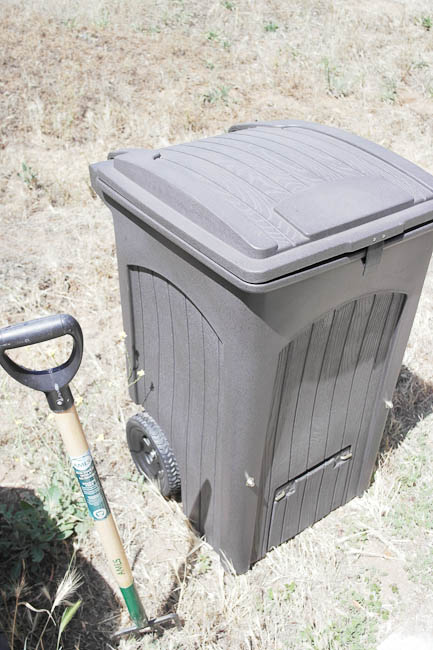
We started needing a little more space for our compost, so Bessie recently got a new friend, the Toter Composter. This thing is the Cadillac of composters. We call him Totes McGotes.
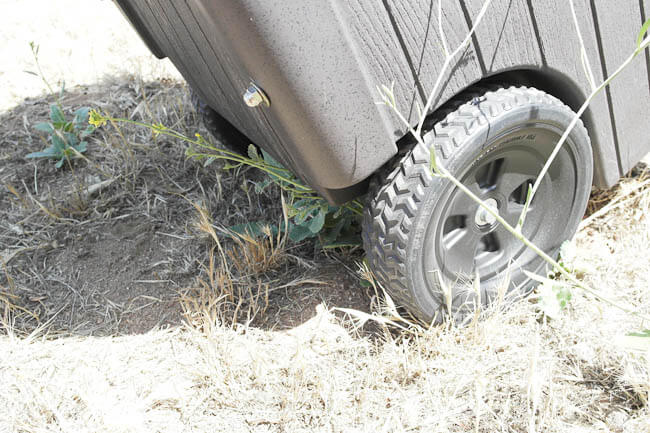
It has wheels, so we can easily tote it around to our various yardwork spots for easy filling.
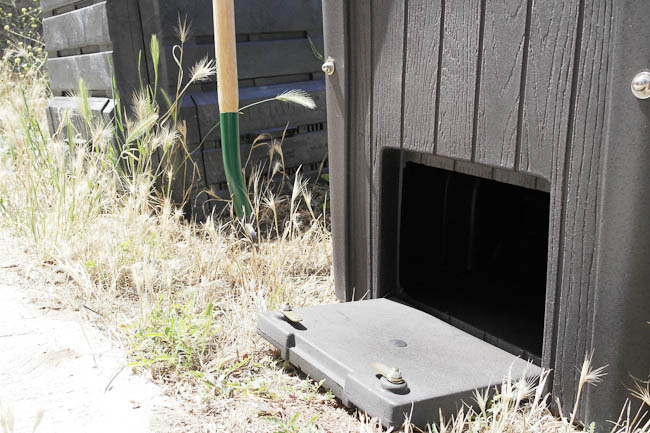
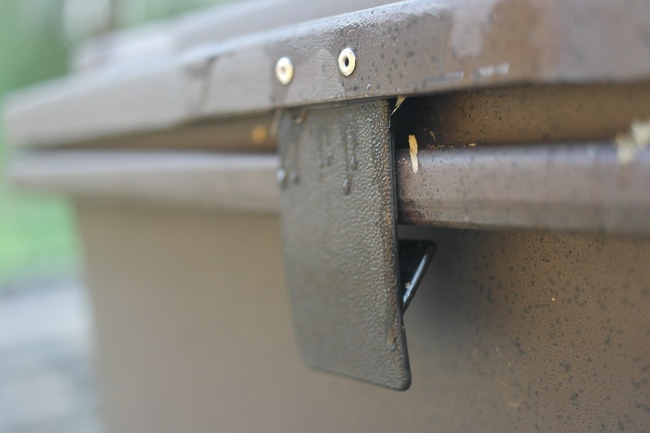
And it has this handy bottom opening so I can pull ready compost out from the bottom while filling the top with new compost materials.
The Easy Peasy Composting Guide
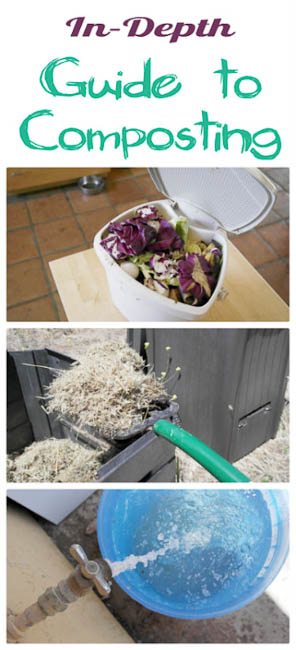
Composting is really very simple. Get a composting unit – they can range from homemade buckets all the way up to trash can-sized complete units like the Toter Composter. We like this big one because it has awesome air flow throughout, cutting the need to constantly turn the pile and minimizing odor problems. Gather scraps from your kitchen to take out to the composter (the Toter Composter comes with an awesome, easy-to-clean scrap bucket that we keep on the counter), add yard waste like brown leaves and grass clippings, and keep the pile damp.
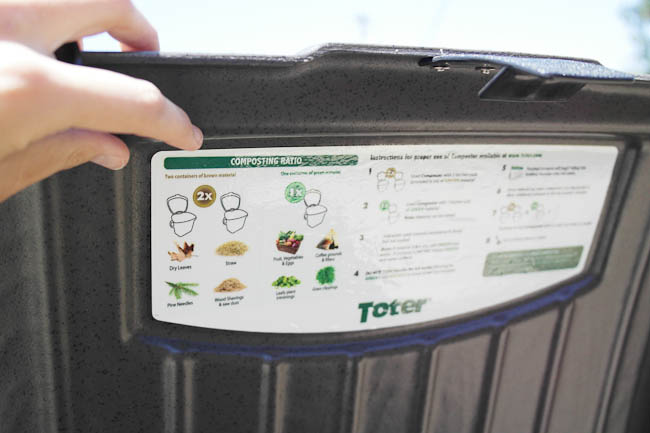
Our new composter has a handy composting guide inside the lid that I can reference whenever I'm looking for exact instruction on what can go in the composter and what quantity of each item makes for ideal composting material. Generally, it's best to go for a 1:2 or 1:3 ratio of one bucket of food scraps to every two or three buckets of dry leaves and yard waste. We often lean more towards a 1:1 ratio, and ours still turns out pretty well.
A couple key things to know:
- You should avoid putting protein-rich substances like oil, meat or cheese in the composter.
- If your pile starts smelling bad and attracting a LOT of insects, you have too many food scraps in the composter. Add more brown yard waste (no fresh weeds that might take root!) and things like cardboard and shredded paper to help even out the balance of nitrogen-rich “green” items to carbon-rich “brown” items. It also helps to chop everything up as finely as possible before adding it to your compost pile.
- If your compost is soggy or slimy, it's too wet. Fluff it up and shield it from additional water with a tarp.
- Bugs will naturally be drawn to your compost pile. Simply remove them by spreading the compost in a thin layer on a tarp before applying compost to your garden. Most bugs will bail quickly when they realize their cozy pile is suddenly completely exposed.
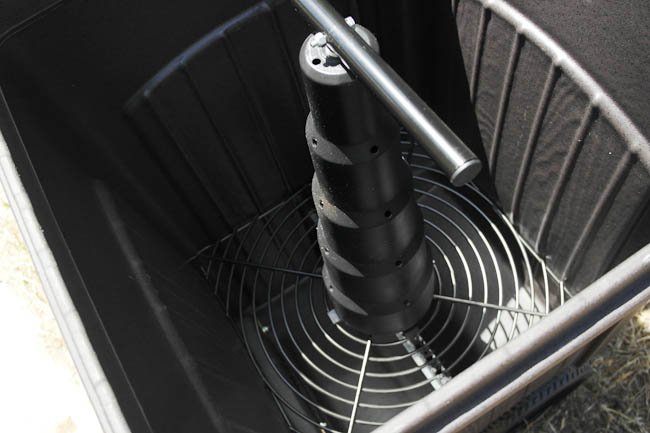
We found that turning and emptying our compost was becoming a cumbersome hassle with Bessie, which is why the easy turn system in this one is a huge bonus. We don't have to mess around with the shovel. The ventilation holes in the composter keep the pile well aerated, and a couple turns of the mixing system every few weeks turns the pile so that old compost can fall through the grate into the collection area, while lesser-broken-down materials stay up top so they can decompose a little longer.
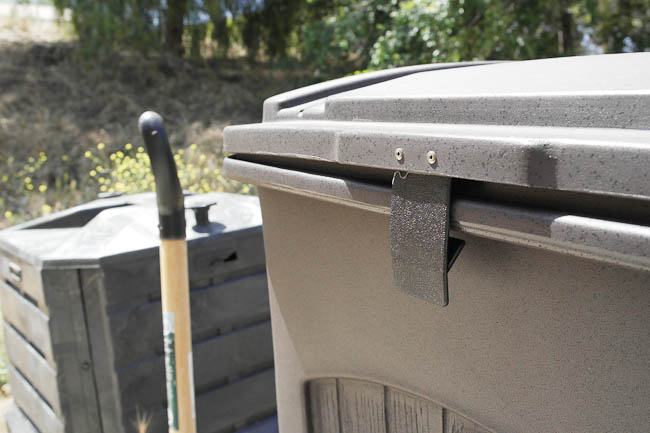
Another thing we've learned is REALLY important for all composters is a secure lid. We had a large bucket for our kitchen scraps sitting outside the back door for awhile so I could make less frequent trips out to Bessie. A raccoon family discovered our goodies and it was a mess. The small, ventilated kitchen bucket that we now keep inside has helped us avoid any further problems while cutting back on odor as we collect food pieces inside the home before transporting them to a locked container out back.
Thanks for reading our composting guide! If you're set on getting started and doing it totally right from the get-go, we highly recommend the Toter Composter. It's about $230 at Home Depot, but the price buys you a lot of time and leeway in composting ease with less turning and continuous processing. There's also no need to ever filter a whole batch through any sort of complicated screening system if you accidentally add too-large scraps. Plus, it comes completely put together for you!
UPDATE: A year later, this composting guide is still one of our most highly-trafficked posts on the site! We've had a lot of questions regarding specifics of how the composter works and what components it has, so we're including some more up-close photos below.
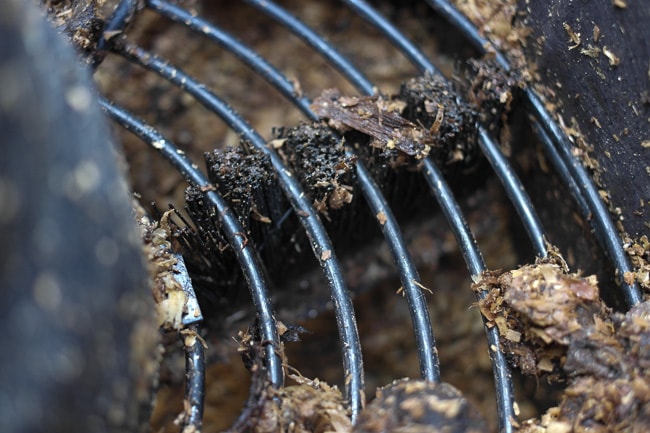
The grate inside that keeps large particles from falling to the bottom has what looks like a broom base on either side attached to a pole that goes up through the middle and turns when I turn the handle.
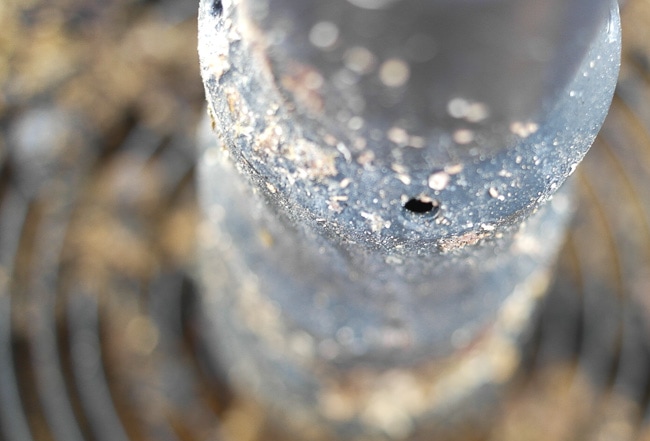
Encasing the pole that turns the broom-sweeper things is what kind of looks like a traffic cone with pencil-diameter-sized holes in it.
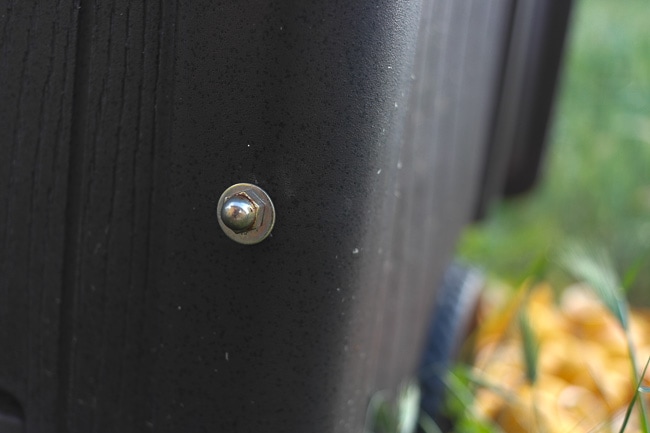
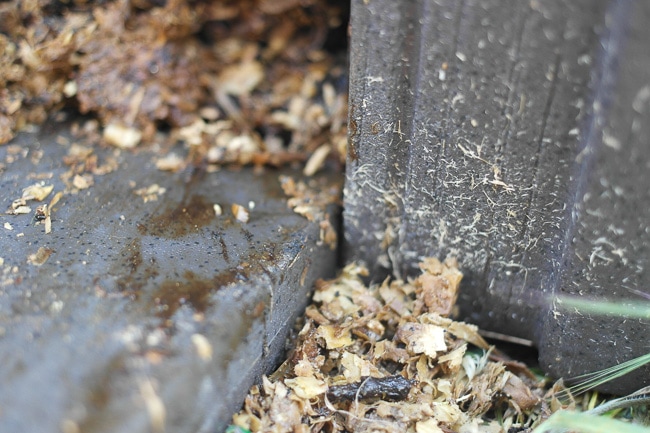
The grate is held in place by four screws on the outside edges of the bin – I think that the grate edges extend through the bin at these points and the screws are secured directly onto the grate.
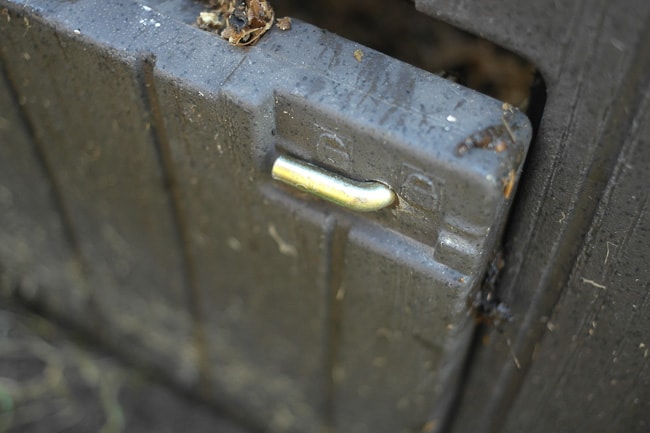
The door at the bottom is held shut by a simple back-and-forth locking mechanism.
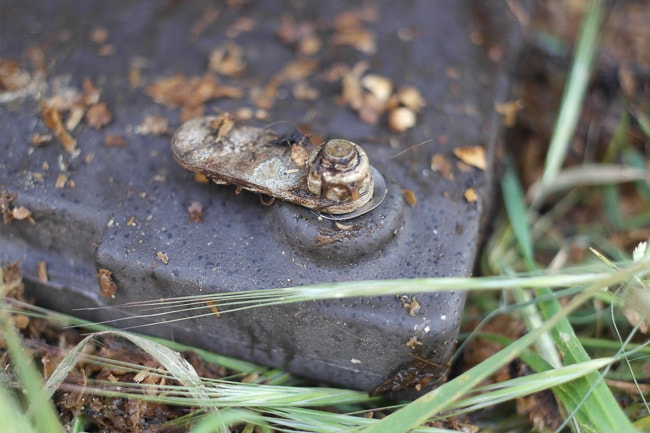
The lock lever operates an arm on the inside.
And the composter door fits tightly on a hinge at the bottom.
The whole thing is held shut by a simple lift-lock that serves to deter raccoons or other rodents.
Do you compost at home? Got any tips to share?
That is one thing that I haven’t been able to bring myself to do. Even Though my daughter keeps asking me to. I started a garden and started to recycle but heck I can’t even empty the litter box, my husband has to do it. This compost bin makes me think that maybe I can do it. I’ll have to think on that some more, Thank you for the great information.
It really is way easier than you might think! I expected it to be another big “task” on my to-do list, but the good thing about composting is that you mostly just let the stuff sit there.
My girlfriend does composting at her house. I honestly never tried it but now your post motivated me too! You gave great advice for a newbie like me to start composting!
Seriously, give it a try! It’s so much easier than it sounds.
My mom just started a pallet garden up north and I called to tell her about this new compost bin. What a great idea. I love it. Thanks so much for sharing!
Have you seen the vertical pallet garden craze taking over Pinterest? That looks like so much fun!
I love that composter!! We were looking into the city program and are so close to jumping in but my husband is so hesitant. With a composter like the Toter I think I could finally get him 100% on board. Because we need to start doing this. The kids are already doing it at school and are constantly asking where our compost pile is.
I LOVE that our city has a program to make it so easy for residents. I can just picture you pointing to the trash can, “The compost bin is here, kids!” Lol. Definitely time to get on that with all the fun gardening stuff you do!
Composting is the one thing I don’t do. Most of our food gets burned in the winter and, the stuff that deer or birds eat gets tossed into the yard for them.
But, this looks really neat and a great idea for those who do compost.
Nate likes to feed stale bread to the birds. It’s fun to watch them all gather…the kids get a huge kick out of it.
You make it seem so easy . I really need to start composting!
I love compost, I couldn’t grow anything until I started composting. Now everything grows! You have given me an idea with Bessie, we have a bin like her but not for compost. Now I’m thinking about converting it somehow. Another great idea I seen was a small tub in your freezer to keep your compost if you don’t go out every day 🙂
I just moved into an older home that had a huge garbage can left from a garbage company that never came & got the can. With some modifying, I think I can turn it into something like you’ve got here. Can you show me some close-up pictures of the holes for ventilation, the door that opens at the bottom, & how the grate & turn system are attached & work? I would be sooo grateful if you could! Thanks!
Absolutely. I’m adding this to my to-do list for today and will shoot you an email as soon as I get the post edited with that for ya!
Hey Rachel – I’ve finally updated the post with up-close photos (took a little longer than expected because I had to clear the composter out…which was good timing for our spring garden). Let me know if you have other questions.
I usually don’t post on blogs. But I just have to. You deserve a great big hug!!!
We have tried two years now to garden, all the while not receiving anything more than a couple of onions. Living in Wyoming we have seen everything from our greenhouse blowing away and our plants getting snowed on in late April. The soil is horrible and we have done everything we can to try conventional gardening. This year is different, we are starting raised beds. I am hoping that we will end up with some actual produce this year.
On the same note, I have decided that I am done wasting money on nutrients and I have plenty right in my garbage can, but oh my Compost…I thought it was going to be hard. I figured it would smell, attract unwanted guests and be a horrible mess. YOU have convinced me otherwise. With your tips I will start my compost bin this year. Thank you!
Yay!!! I had all the same notions and refused to give it a try until we had plenty of space (you know, in case this whole composting thing went severely wrong…haha). Man, I wish I had started sooner. It’s so easy!